Many of the Jaeger rifles I have seen have an intaglio stamping of some sort in the barrel. Often these are maker’s marks or the mark of the master smith. The images can be letters, or symbols, or sometimes tool, like shears, or hammer and anvil. Sometimes there is a single large stamp, or the stamps can be smaller, and can be found in multiples of threes or fours.
I chose this goat, because I liked him, and he is distantly related to the Satyr or faun on the cheekpiece inlay of my current rifle. This fellow may be from a heraldic crest or illustration of a children’s book.

Making the master pattern
What I am doing here, is making a positive model, which I will use to form a negative image. I chose to work in the positive, because it is much easier than cutting a negative cavity of the goat. When this master is complete, and hardened, it will be pressed into soft steel to make the actual stamp. In other words, this master is merely a tool to make another tool.
Here is a piece of 0-1 tool steel, with the goat roughed out. Really gouged out with a round nosed tool, and the goat is outlined with a vee tool. The goat is 5/16 of an inch long, from nose to tail. Maybe the deepest cuts are 1/64″. This will be forming gold later on, and the deeper it is, the more gold I will need to use.

The raised area is then modeled with various tools, chisels, scrapers and burnishers, to get a fully developed form.

The finished engraved master is placed in a tin can, packed with charcoal. The charcoal prevents scale from building up on the surface of the stamp.

Then the can is placed in a deep charcoal fire. I like the can to be orange hot for a full half hour. I then dump the contents of the can into hot water. This steel, 0-1, is actually oil hardening, but I use hot water. More environmentally friendly. Oh, and there is a screen at the bottom of the plastic pail, to keep the hot chunk of steel from melting through the bottom.

Now here is the hardened image. I quenched it in the hot water, and then brought it back up to 400 degrees for a half an hour. This makes the steel less likely to crack or chip.

Making of the stamp
Now that I have my goat master formed in hardened steel, I can press that ‘goat’ into soft steel. I prepared a blank stamp out of soft 0-1 steel, with the stamp area raised above the body of the stamp. On the right foreground is the blank stamp, and to its left is the hardened goat master. Behind these two pieces is the press.
(click on any picture to enlarge)

Now I have the two pieces in proper alignment, and clamped up in the press. The threaded rods are used merely to clamp the parts, and to keep the two halves of the press level as I pound on the top jaw. I should say, it’s more of a heavy tapping. At every blow, I tighten the nuts. It’s the hammer that does the work. The nuts just keep the work from shifting. I measure the spacing on each end of the press every so often to make sure it’s staying parallel.

Now the goat image is pressed into the new steel workpiece. If you click on the photo to enlarge it, you can see you wavy surface of the new stamp. I had to file the face of the new stamp flat and re-press several times to fully impress the soft steel into the master

Here is the stamp, chucked up in the lathe, to turn off the excess material, and to center the image. Note the little border of dots that I punched in by hand.
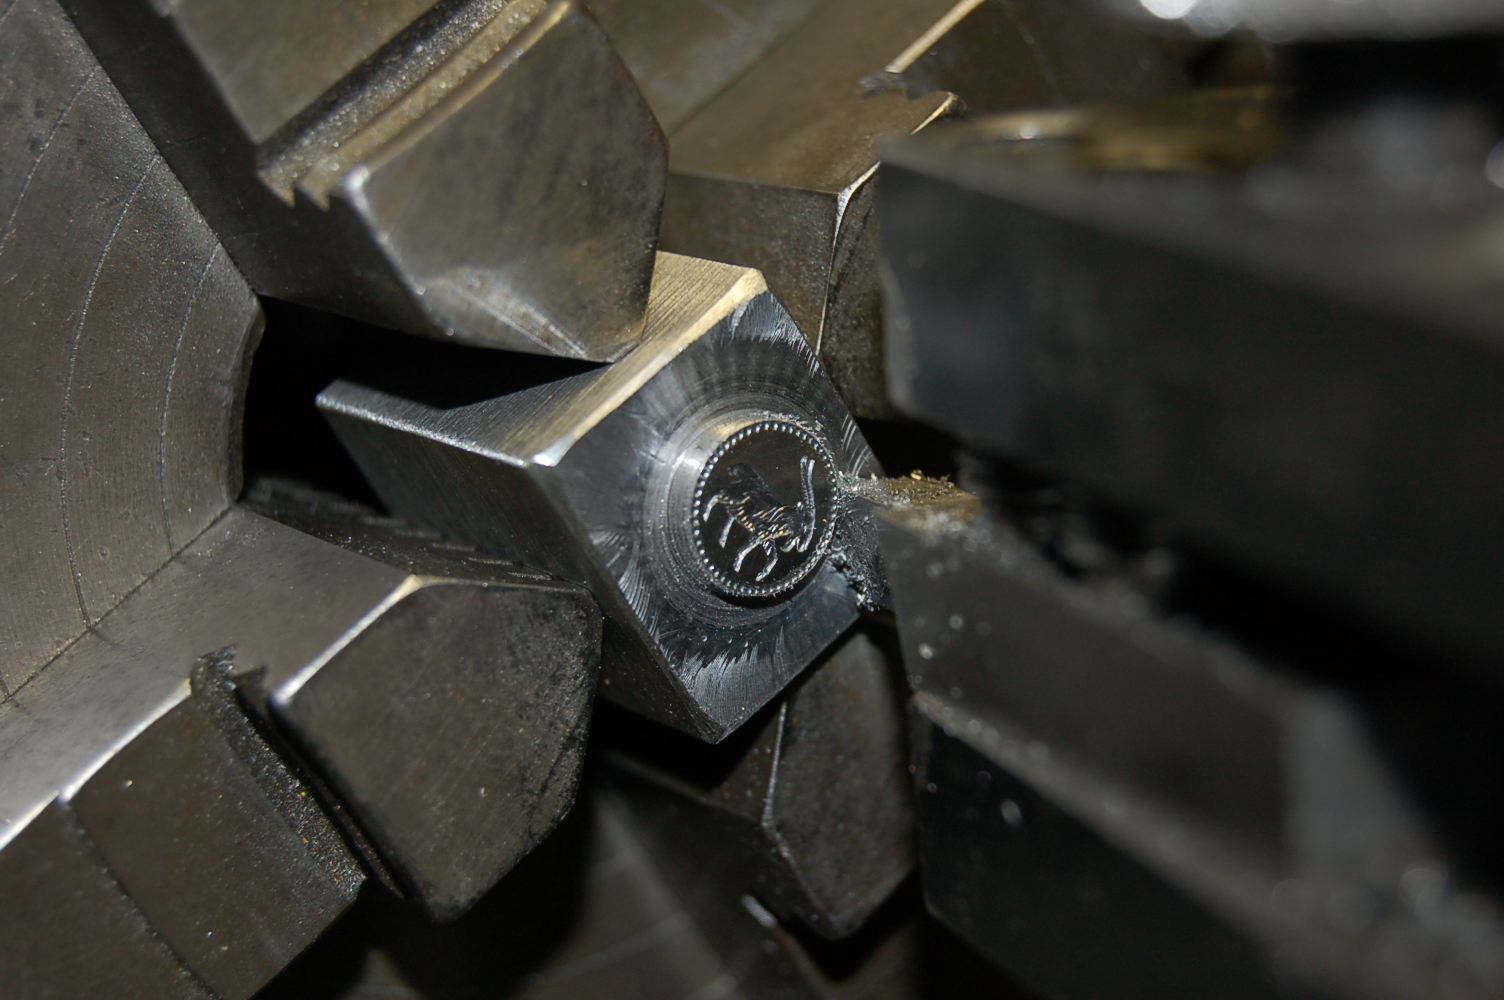
Up to this point, the steel has been malleable and machinable. Now I harden it in the charcoal fire. The stamp is now ready for use.

Proofing the stamp
Now that the stamp is hardened, I want to proof it in silver, to make sure it will work for the barrel stamping I cut a piece of fine silver, anneal it completely, and position it on the stamp. I place the stamp and the silver carefully in the press, the same press shown earlier. Carefully I tap the top of the press and tighten as I go. I take a guess about how much pressure, how much tapping…..until I feel it’s about right….and I open the press, holding my breath…………..

Testing the stamp in a barrel
I thought I’d better learn how to do this before I set to work on my REAL gun barrel. This is just a scrap piece of barrel for trying out techniques on, so no harm done if I mess up.
There is a disk of silver, that drops into the pocket I prepared in the barrel. The pocket itself has an undercut all the way around the perimeter for the silver to smoodge into. With a graver I raised a bunch of little barbs on the floor of the pocket to grip the silver once it gets pressed in. Note that the disk is a little sloppy in fit, not quite round, but that it does not matter. The silver will squeeze out under the die to close up any gaps.

Here it is, all pressed in and the barrel has been re-heated to turn the steel blue. This kind of blue is not very permanent, but it was commonly used in the 18th Century.


September 12, 2008 at 5:40 pm
Wow, Tommy,
YOu old goat you. Thank you for the lesson is stamping, It is really fascinating, Your work is glorious! Love, JR
September 12, 2008 at 7:42 pm
You knbow what I like best? That you take pictures along the way. Such forethought! And then you share, share, share. That’s lovin’. That’s you, Tom, all over. Thanks for sharing!